How to Whitewash Timber
Whitewashing timber is a popular technique to give wood a renewed look while allowing the natural grain to shine through. This guide will walk you through the entire process from understanding what whitewashing is to preparing the timber and applying the finish.
Understanding the Basics of Whitewashing
What is Whitewashing?
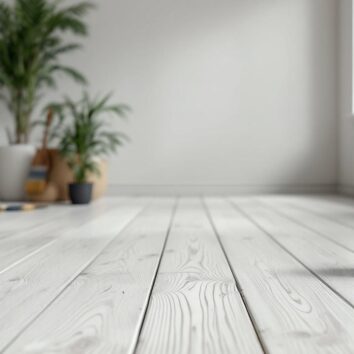
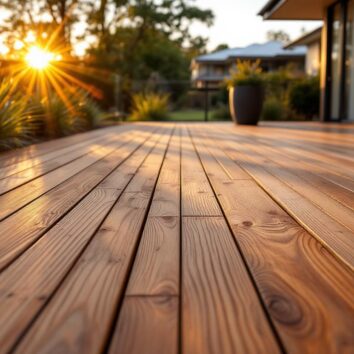
Whitewashing is a method of applying a diluted white paint or a mixture of water and lime to wood surfaces, such as decking and wooden furniture. It’s a traditional technique that enhances the appearance of timber while providing some protection against elements. Unlike paint, whitewash allows the wood grain to remain visible, creating a softer and more rustic aesthetic.
The technique has its roots in older architectural styles where it was used to brighten up spaces and provide a rustic charm. Today, whitewashing is favoured for its versatility and the modern, airy feel it brings to both interior and exterior designs. The process is not only aesthetically pleasing but also functional, as it can help to reflect light in dimly lit areas, making spaces feel larger and more inviting.
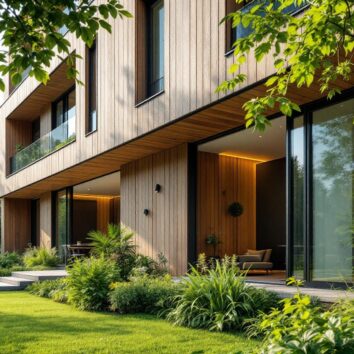
Whitewash Wood Furniture
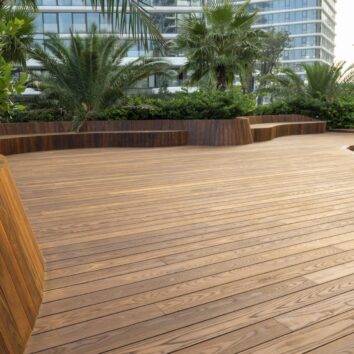
The whitewashing technique can also improve the appearance of bare wood and wood furniture, such as a dining room table or outdoor chairs.
Benefits of Whitewashing Timber
-
Enhances Aesthetics: Whitewashing furniture gives a fresh, clean look while highlighting the natural beauty of the wood grain.
-
Eco-Friendly: Often made from non-toxic ingredients, whitewash is a safer option for both the environment and indoor air quality.
-
Easy to Apply: The application process for whitewashing wood is straightforward, making it accessible for DIY enthusiasts.
-
Cost-Effective: Compared to traditional paints, whitewashing can be a more economical choice as it often requires fewer materials.
In addition to these benefits, whitewashing can also be a great way to rejuvenate an old piece of furniture, decking or architectural features without the need for extensive restoration. The translucent nature of whitewash allows for creative layering techniques, enabling homeowners to achieve a variety of finishes, from a subtle wash to a more opaque look, depending on their preferences.
This adaptability makes whitewashing an appealing choice for those looking to customize their living spaces.
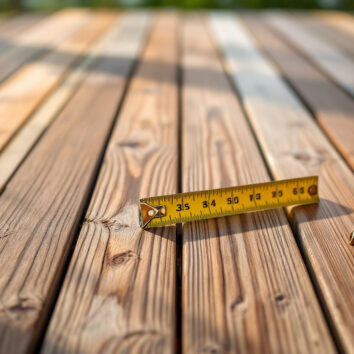
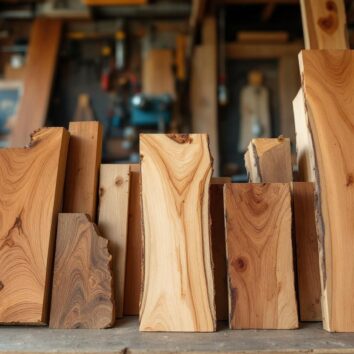
Choosing the Right Timber for Whitewashing
Not all types of timber are equally suitable for whitewashing.
While many softwoods like pine and cedar take the whitewash finish beautifully, hardwoods like oak or walnut may require different preparation techniques to achieve the desired results. When selecting timber for whitewashing, consider the following:
-
Handpick wood that has an attractive grain pattern.
-
Avoid timber that has knots or severe imperfections, as these can affect the final white washed finish.
-
Ensure the wood is dry; moisture content can hinder proper adhesion of the whitewash.
Additionally, it's essential to consider the intended use of the timber.
For instance, if the wood will be exposed to high moisture areas, such as bathrooms or kitchens, it may be beneficial to apply a sealant over the whitewash to enhance durability. Furthermore, experimenting with different types of wood can yield unique results; for example, reclaimed wood can add character and history to a project, making the whitewashing process even more rewarding.
Ultimately, the choice of timber can significantly influence the overall aesthetic and longevity of the whitewashed finish.
Necessary Tools and Materials To Whitewash Wood
Tools
Before undertaking a whitewashing project, gather all the necessary tools to ensure a smooth process. Here’s the tools and materials needed:
-
Paint brush or rollers for applying the whitewashing mixture.
-
A painting tray to hold the whitewash paint.
-
A clean rag or a lint free cloth for wiping off excess white wash paint.
-
Sandpaper or a sander for surface preparation.
In addition to these basic tools, consider having a drop cloth on hand before you start painting to protect your floors and furniture from accidental spills. A ladder may also be necessary if you're working on high walls or ceilings, ensuring you can reach every corner of the space efficiently.
For larger projects, a spray bottle can be useful for misting the surface before application, which helps the whitewash adhere better and achieve a more even finish.
Selecting the Right Whitewash
Whitewash can be made from various materials, including traditional lime and water mixtures or more contemporary paint and water solutions.
When choosing your whitewash, consider the following options:
-
Lime-Based Whitewash: Offers excellent breathability and is highly suited for exterior timber.
-
Water-Based Paint: This diluted paint option is easier to work with and this whitewash dries faster, making it ideal for indoor projects.
-
Ready-Mixed Whitewash Products: These are available at hardware stores and can save time, providing consistent results.
It's also important to think about the finish you desire.
A thinner whitewash will allow more of the underlying material to show through, creating a rustic, farmhouse look, while a thicker application can provide a more opaque appearance. Additionally, consider the colour of the base material; different woods or surfaces can affect how the whitewash appears once applied, so testing a small area first is always a wise choice.
Safety Equipment You'll Need
As with any DIY project, safety should be a priority. Ensure you have the following equipment:
-
Protective gloves to keep your hands safe from chemicals.
-
Goggles to protect your eyes from splashes.
-
A mask if working in an enclosed area to avoid inhaling fumes or dust.
In addition to these essentials, consider wearing old clothing or an apron that you don’t mind getting stained, as whitewash can be difficult to remove from fabrics.
If you're particularly sensitive to odours or sanding dust, you might also want to invest in a respirator for added protection. Always ensure your workspace is well-ventilated, especially if you're using products that emit strong fumes, to maintain a safe and comfortable environment while you work.
Preparing the Timber for Whitewashing
Cleaning the Timber
The first step in preparing your timber is to thoroughly clean it. Remove paint, dirt, grease or any existing finish. Here’s how to properly clean your timber:
-
Use a mixture of water and mild detergent to scrub the surface.
-
Rinse with clean water, avoiding saturating the wood.
-
Allow the timber to dry completely before moving on to sanding.
It’s essential to pay attention to any crevices or knots in the wood, as these areas can trap dirt and grime. A soft-bristled brush can be particularly useful for getting into these tight spots.
Additionally, if your timber has been exposed to the elements, you may want to consider using a wood cleaner specifically designed for outdoor use, which can help to break down any mildew or mould that may have developed over time.
Ensuring that the timber is impeccably clean not only improves the appearance but also enhances the overall adhesion of the whitewash.
Sanding the Surface
Once the timber is clean and dry, light sanding is crucial to create a smooth surface for the whitewash to adhere to. Follow these steps:
-
Use medium-grit sandpaper (around 120 grit) for initial sanding, and switch to fine-grit (220 grit) for a smooth finish.
-
Sand in the same direction of the wood grain to prevent scratching.
-
Dust off any particles with a clean damp cloth after sanding.
When sanding, it's also beneficial to inspect the timber for any imperfections, such as splinters or rough patches. These can be carefully addressed during the sanding process to ensure a flawless finish. If the timber has deep grooves or old paint remnants, consider using a power sander for efficiency. It's also important to note you can't whitewash over varnished wood, as the stains and varnish will prevent whitewash from soaking into the wood.
Always remember to wear a dust mask and goggles to protect yourself from fine particles that can become airborne during sanding.
Applying a Primer
Applying a primer is often a good idea, especially for softer woods. It helps the whitewash adhere better to the raw wood while preventing absorbency that could lead to uneven application. Use a water-based primer for best results. Here’s how:
-
Using a brush, apply an even coat of primer paint directly to the entire surface.
-
Allow the primer to dry completely according to the manufacturer’s instructions.
In addition to improving adhesion, primer can also enhance the vibrancy of the whitewash colour.
If you’re working with a particularly porous wood, consider applying a second coat of primer to ensure a uniform base. For those looking to add a touch of creativity, tinted primers are available that can subtly influence the final hue of your whitewashed surface.
Always remember to check the compatibility of the primer with your chosen whitewash to achieve the best results.
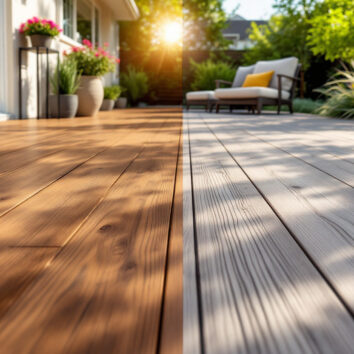
The Whitewashing Process
Mixing the Whitewash
With the timber prepared, it’s time to mix your whitewash.
For a basic mix, combine one part paint to three parts water for a semi-transparent finish. Adjust the ratio depending on your desired opacity. The type of paint you choose can also impact the final look; consider using a matte finish for a more subdued and rustic appearance, or a satin finish for a slight sheen that catches the light beautifully.
Mix thoroughly to ensure consistency, and it's wise to test the mixture on a scrap piece of timber first to check how it will look. This step is crucial as it allows you to see the colour in different lighting conditions, ensuring you’re satisfied with the hue before committing to the entire project.
Additionally, experimenting with different colours can yield unique results, so don’t hesitate to mix in a hint of colour to personalize your whitewash.
Applying the Whitewash
Now comes the exciting part. Apply the whitewash using a brush or roller. Depending on how much of the wood grain you wish to show through, the application technique can differ:
-
For a more rustic look, apply liberally and then wipe off excess.
-
For a cleaner finish, apply a thin layer and allow it to dry before adding more.
Always work in small sections to maintain control and consistency. Once you’ve applied the first coat, allow it to dry completely before proceeding to additional coats.
Consider the ambient temperature and humidity, as these factors can significantly affect drying times. In cooler or more humid conditions, it may take longer for the whitewash to set, so patience is key during this stage.
Adding Additional Coats
After the first coat is dry, evaluate the colour intensity. Depending on the look you want to achieve, you may need to apply many coats to achieve your desired whitewash look.
If you desire a more opaque finish, apply one, two or three coats using the same process as before. Allow sufficient drying time between coats to achieve your preferred look, such as letting the timber dry overnight. It’s also a good idea to lightly sand between coats with fine-grit sandpaper to create a smoother surface and enhance adhesion, resulting in a more polished finish.
Once you’ve reached the desired appearance, it’s essential to finish with a sealant, especially for outdoor projects, to protect the timber from weather exposure.
A water-based sealant is often recommended as it won’t yellow over time and will maintain the integrity of your whitewashed furniture. Additionally, consider reapplying the sealant every few years, especially in areas with harsh weather conditions, to ensure your whitewashed wood remains protected and beautiful for years to come.
By following this comprehensive guide, you can confidently whitewash furniture and timber, giving it a lasting beauty while preserving its natural characteristics. Embracing the whitewashing process not only enhances the visual appeal of your wood surfaces but also allows you to express your creativity and personal style in home decor.
Browse the large range of timber products available at Pine Timber Products, or contact us for more information and expert advice on whitewashing timber.