When embarking on outdoor projects, whether it’s building a deck, fence, or pergola, choosing the right materials is crucial. Large timber posts are not only functional but also add an aesthetic appeal to any outdoor setting. This guide will walk you through the process of selecting and installing large timber posts, ensuring your project stands the test of time while enhancing your outdoor space.
Understanding the Importance of Timber Posts
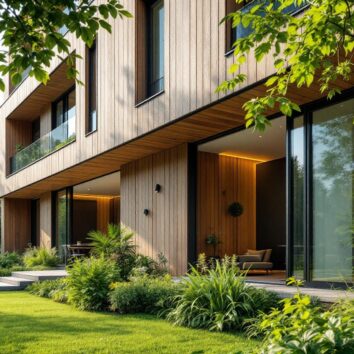
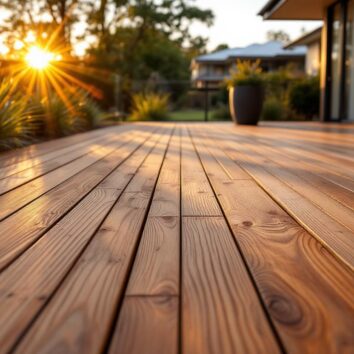
Timber posts serve as the backbone of many outdoor structures. They provide support and stability, ensuring that your projects remain safe and durable. In Australia, where weather conditions can vary significantly, selecting the right type of timber is essential for longevity.
Moreover, timber posts can enhance the visual appeal of your outdoor areas. With a variety of species and finishes available, you can choose posts that complement your home’s architecture and landscaping. The natural beauty of timber, with its unique grain patterns and rich hues, can add warmth and character to any outdoor setting, making it not just functional but also aesthetically pleasing.
Additionally, timber posts can be treated with various finishes to enhance their resistance to the elements. For instance, applying a protective sealant can help prevent moisture absorption, reducing the risk of warping or cracking over time. This not only prolongs the life of the posts but also maintains their appearance, ensuring that your outdoor structures continue to look their best for years to come.

Types of Timber Suitable for Outdoor Use
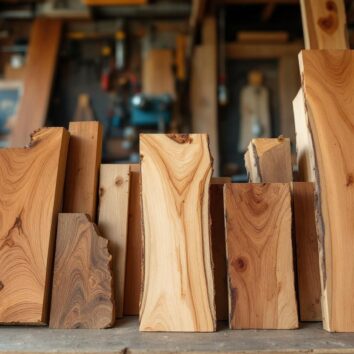
When it comes to outdoor projects, not all timber is created equal. Certain types of timber are more suitable for outdoor use due to their natural resistance to decay and pests. Common choices include:
- Hardwood: Species like Jarrah and Spotted Gum are known for their durability and strength, making them ideal for structural posts. Their dense composition not only provides exceptional strength but also makes them less susceptible to damage from insects and fungi.
- Treated Pine: Treated Pine is a popular option due to its affordability and ease of use, although it may not last as long as hardwood. The treatment process involves infusing the wood with preservatives that help protect against rot and pests, making it a viable choice for many homeowners.
- Recycled Timber: This eco-friendly option can add character to your project, but ensure it’s been treated for outdoor use. Recycled timber often comes with a history, adding a unique charm to your outdoor structures while also being a sustainable choice that reduces waste.
Factors to Consider When Choosing Timber Posts
Several factors should influence your choice of timber posts:
- Size and Dimensions: Ensure the posts are appropriately sized for the structure you’re building. Larger posts provide more stability but may be heavier and more challenging to work with. It's crucial to balance the aesthetic appeal with structural integrity to achieve the desired outcome.
- Treatment: Look for posts that are treated for outdoor use, particularly against termites and other pests. This treatment can significantly extend the life of your timber. Additionally, consider the type of treatment used, as some methods are more environmentally friendly than others.
- Cost: While it’s tempting to go for the cheapest option, consider the long-term benefits of investing in higher-quality timber. Higher initial costs can often lead to savings down the line, as durable timber requires less maintenance and replacement over time.
Furthermore, the sourcing of timber is also an important consideration. Opting for timber that is sustainably harvested not only supports responsible forestry practices but also contributes to the conservation of natural habitats. By choosing timber from certified suppliers like Pine Timber Products, you can ensure that your project is not only beautiful and durable but also environmentally conscious.
Lastly, it's worth noting that local climate conditions can affect the performance of timber posts. For instance, areas with high humidity may require more robust treatments to prevent mold growth, while regions prone to wildfires might benefit from fire-retardant treatments. Understanding these regional factors can guide you in making the best choice for your specific needs.
Preparing for Installation
Before diving into the installation process, proper preparation is key. This step not only ensures a smoother installation but also enhances the durability of your structure.
Gathering Tools and Materials
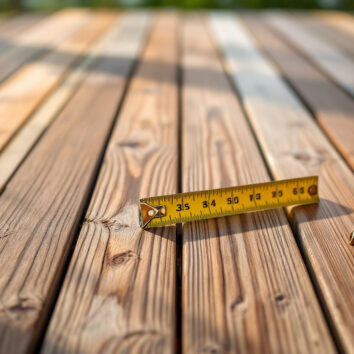
Having the right tools and materials on hand will make the installation process more efficient. Essential tools include:
- Post hole digger or auger
- Level
- Concrete mix for setting the posts
- Measuring tape
- Safety gear, including gloves and goggles
Additionally, ensure you have enough timber posts and any other materials needed for your project, such as beams, brackets, and screws.
Choosing the Right Location
The location of your posts is crucial for the success of your project. Consider the following:
- Soil Type: Ensure the ground is stable and suitable for supporting the posts. Sandy or loose soil may require additional support.
- Drainage: Avoid areas where water tends to pool, as this can lead to rot over time.
- Sunlight: Consider how much sunlight the area receives, as this can affect the longevity of the timber.

Installation Steps for Large Timber Posts
Once you have selected your timber and prepared the site, it’s time to begin the installation process. Follow these steps for a successful setup.
Digging the Post Holes
The first step in installing your timber posts is to dig the holes. The depth and width of the holes will depend on the size of the posts and local building codes. Generally, a depth of at least one-third the height of the post above ground is recommended.
Use a post hole digger to create holes that are wide enough to accommodate the posts. Make sure the holes are straight and level to ensure stability.
Setting the Posts
Once the holes are ready, it’s time to set the posts. Here’s how to do it effectively:
- Place the post in the center of the hole, ensuring it is upright and level.
- Mix the concrete according to the manufacturer’s instructions and pour it into the hole around the post.
- Use a level to check that the post remains vertical as the concrete sets. Adjust as necessary.
- Allow the concrete to cure fully before proceeding with any additional construction.
Finishing Touches and Maintenance
After the posts are installed, consider adding finishing touches to enhance their appearance and protect them from the elements.
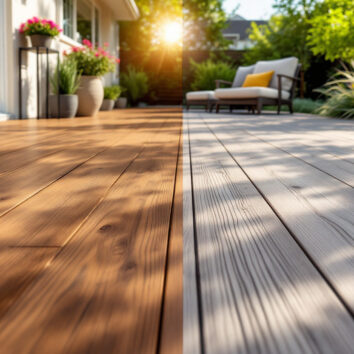
Sealing and Staining
Applying a sealant or stain can help protect the timber from moisture and UV damage. Choose products specifically designed for outdoor use to ensure the best results. Regular maintenance, such as reapplying sealant every few years, will extend the life of your posts.
Regular Inspections
It’s essential to periodically inspect your timber posts for signs of wear, rot, or pest damage. Early detection can save you from costly repairs down the line. Look for cracks, soft spots, or any signs of insect activity. For maintenance advice or replacement materials, contact Pine Timber Products.